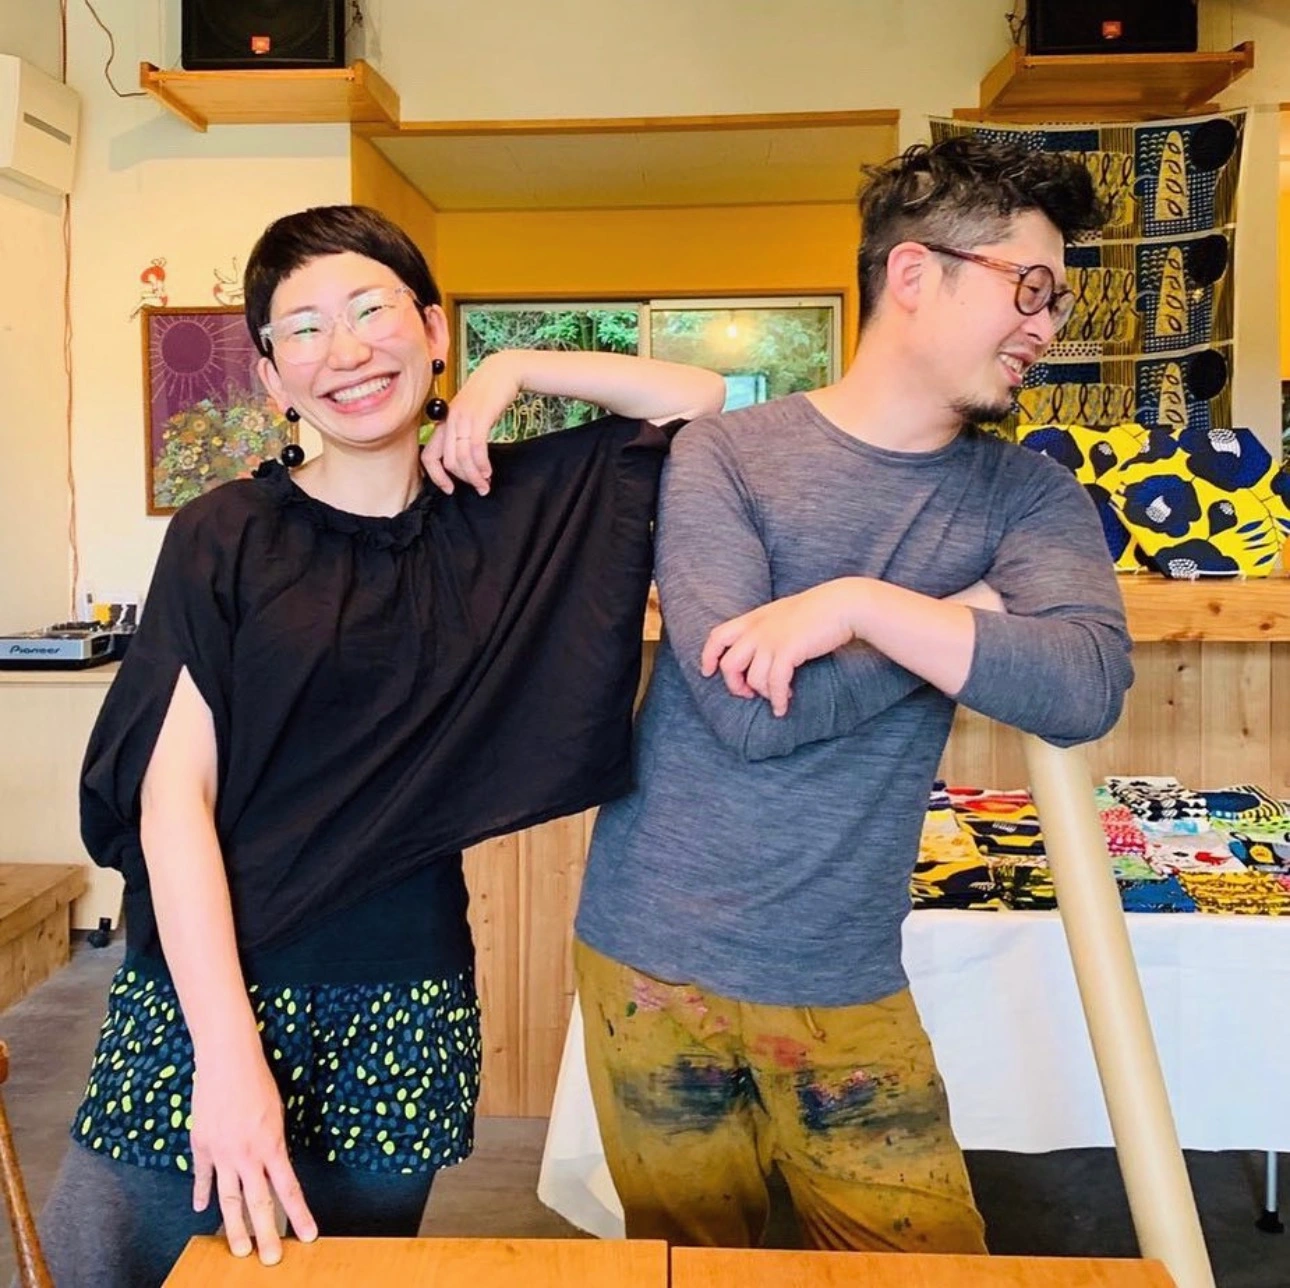
Why Makumo Textiles Is So Special There’s something different about sewing with a piece of fabric when you know exactly who made it. Makumo Textiles is a small, independent design house run by Miki and Tomota, a husband and wife team who live on an island in the south of Japan with their three daughters. Their home and attached atelier sit by the sea, filled with colour, fun and fabric in every corner. Miki is the designer behind the joy-filled prints, and Tomota brings each one to life, hand dyeing every single piece himself. They live in this quiet, creative corner of the world with their three daughters. Every Makumo design starts with Miki’s love of vibrant colour and interesting, movement-filled lines. Once she is happy with the design and the colours, from there, it’s Tomota’s turn to play his part in bringing them to life. First, mixing up the rich, eye-catching colours that Miki likes to design with. Working layer by layer, he uses a separate stencil for every colour in the design. He works down the length of the dyeing table, dyeing every second panel before coming back to fill in the gaps between. Once the layers of dye has dried, the fabric is then rolled between Japanese washi paper and newspaper, steamed, and washed multiple times before it’s ready. The dyeing table can only hold five metres of fabric at a time, and each length takes a full day to dye! That’s the part that makes these fabrics so special. They aren’t pulled off a shelf.They’re hand dyed to order, just for you, by two people who are entirely self-taught and who built their craft and their community from the ground up. When Tomota begins dyeing your length of Makumo fabric, he’s working from a recipe he’s spent years perfecting, in a home he shares with his family. Once your fabric arrives, you get to feel that care in your hands. And when you wear or use what you’ve made, you’re wearing something that a real person poured their heart into, not just a print. These are the kinds of fabrics that will have strangers stopping you in the street to tell you they love your outfit. Get ready to feel amazing in what you make with them and to say “Thanks I made it!” each time you step out. Choose Your Substrate Every Makumo design is available across four different fabric types, so you can pick whichever suits the project you have in mind (or simply whichever you love to wear most). Chino Cloth (100% Cotton) A bottom weight, twill weave fabric with a textured hand. Perfect for pants, shackets, and jackets. Double Gauze (100% Cotton) A Japanese speciality fabric made of two layers of muslin joined with tiny tacks. Light weight and airy, a dream to wear. Cotton Linen (85% Cotton, 15% Linen) Light to mid weight and breathable, this is the all-rounder of the group. Great for tops, dresses and pants. Cotton Shantung (100% Cotton) The slub of the fibres gives this mid weight fabric a beautifully textured, ribbed effect. Perfect for a statement sleeve top, dresses and so much more. Available designs and colourways Candy (Turquoise Orange, Bright Blue, Pink, Rose, Yellow) Botan (Yellow, Ultramarine Blue, Blue and Cream, Red *back by popular demand*) Rooster Check (Red, Bright Blue, Pink *back by popular demand*, Turquoise Orange, Yellow) Masu (Ultramarine Blue, Blue and Cream, Rose, Yellow, Turquoise Orange) How to Order Pre-orders for this year’s Makumo Textiles collaboration start on 20 September and close on 3 October. If you want early access, sign up to my newsletter list below. Once the sale closes, Tomota will begin hand dyeing each order, working through them one five metre length at a time, with fabric expected to ship out in December, approximately 10 weeks later. Because every piece is made to order, this collaboration only comes around once a year, with new designs each time. If a design is speaking to you, get it now so you don’t regret missing out. It’s worth taking the time now to choose your favourite designs and substrates before pre-orders close.
Morningside Dress and Shirt Sew Along – Find Your Size
Sewing Challenges I’m not talking about the kind of sewing challenges we know and love like Sew Frosting, Me Made May and so many more. I’m talking about those garments you want to sew and you add them to your to-make list. BUT you keep putting them off because something about it is intimidating. You know those makes, right?! For me, I’ve been eyeing off lots of gorgeous blouses and shirtwear, yet the placket is what kept them at bay for me. But you know what? it’s absolutely one of those things, that once you do it, it’s nowhere near as tricky as you’d think. What I love even more than coming to this realisation, is that feeling you get when you give yourself a challenge and you conquer it! So, that’s what I’m SO excited to do with you this Tuesday!! Let’s sew those plackets and make these fab shirts and dresses!! Sew along time As we start prepping for the Morningside dress and shirt sew along this Tuesday, the first thing we need to do is work out what size to sew. This dress and shirt have some lovely ease built into the pattern so it makes determining your size a little easier than a super fitted garment. I pulled together some inspiration for making a multitude of different looks with this pattern in my last post. You’ll also find a 25% DISCOUNT CODE there if you still need to pick up the pattern, then pop over and get the pattern here! Knowing your size In order to know how much fabric you need, you’ll have to work out what size you want to make. Measure measure measure The first thing you need to do is re-measure your bust, waist and hip measurements. You may know these off the top of your head but it doesn’t hurt to make sure your info is up to date! Being able to make clothes to fit your body is one of the biggest benefits of sewing your own wardrobe! And if you’re going to spend precious time and fabric on this make, I think it’s really worth setting ourselves up for the best possible fit from the start. Take your bust and hip measurements at the widest part and take your waist where it naturally creases as you bend to the side. Check body measurements Once you’ve got your own measurements written down, have a look at the size chart of the pattern listing or on page four of the pattern instructions. See what size your personal measurments fall under and note it next to each. If your measurements all fall under one size then you don’t need to look much further! However, patterns are drafted off a particular block so they will very rarely match you exactly. It’s most common that you’ll span a number of sizes across your measurements. No box will contain me! You can see in the pic above that my bust and hip measurement came under L but my waist under XL. So the next step is to refer to the Finished Garment measurements. Have a look at what sizes your measurements come under and see if there is one that still has the ease you want for the room to move, eat and play! But also, the amoutn of ease for the look you want – looser? More fitted? If not, you can chose to go with different sizes and grade between them. Never fear if you haven’t done this before. I’ll break this down when we print our patterns! For my measurements, I decided that there was enough ease at the waist that I could just sew a straight size L. The long and short of things Finally, look at the finished garment length for the size(s) you’ve chosen. This will help you deicde if you want to add or take away any length. I take my tape measure and line it up with my shoulder seam to visualise where the hem will fall. Note that with the Morningside the beautiful curved hem sits higher at the front than the back and again another 8 – 9cm higher at the side. So take all of these into consideration. If you’re finding it hard to picture, I like to measure the length of a shirt or dress that I lalready own and like where it falls. Don’t get too worried about it here. You just want to use these meausrements as a guide so you can leave enough material when you’re cutting your pattern out and you can always try on and adjust as you sew! I would definitely advise making a muslin if you have the time and energy. That way you can make your best guess at your size via the measurements, see how it sews and make any adjustments before using your precious fabric! That said, I’m a recovering impatient sewist so I don’t always take my own advice in this regard! So now you know how to work out your size, the supplies you need are straightforward. Your fabric, thread, 5 buttons, light weight fusible interfacing and you’re good to go! Check back tomorrow for my next post with all my tips on selecting your fabric and working out just how much you need. Drop any questions you may have in the comments below or send me a message and let me know if you’ll be joining in on the fun come Tuesday! If you haven’t already, sign up to my newsletter so you don’t miss any of the tips and tutorials coming this way soon! See the other posts related to the Morningside Dress and Shirt Sew Along: Styling
French Navy Morningside Dress & Shirt Sew Along
I’m beyond excited to announce another #sewitwithindybindy!!! I loved having virtual sewing buddies and seeing all your makes in the last sewalong! And I got so much lovely feedback from you that it helped to tackle the often intimidating challenge of sewing pants. So, onto the next challenge! When I think of intimidating sewing skills, sewing a placket comes to the top of the list. Together, let’s get this skill under our belt too. The super stylish and versatile Morningside Dress and Shirt by French Navy is going to help us do this. The sew along will start on Tuesday 24th September and will run for 7 days. I’ll be posting here and going live on Instagram daily on everything from cutting out the pattern to the very final stitch on the sleeve. I’ll be giving you will be lots of support throughout and even something to win at the end! Yay!! Stay tuned for details.. If you don’t have the Morningside sewing pattern yet, you can get it in store here. Make sure you use the code SEWWITHINDYBINDY for a 25% discount!! I’ll be sharing lots of tips in the lead up so make sure you are signed up to my newsletter so you don’t miss any of them! The Morningside dress & shirt are perfect for this in between season we’re in. Lovely and light on it’s own or fabulous for layering when it’s chilly. They are SO comfy, stylish, and the pattern is beautifully constructed. Both the dress and shirt work with a huge range of fabrics from lightweight and drapey to mid weight wovens. To help with your planning, I’m sharing my favourite inspiration for some of the different directions they could be taken. Colour pop! There’s nothing I love more than injecting some colour and fun into my wardrobe. Putting on a me made in a bright colour or print is the best way to start the day! Stripe play This pattern has lots of opportunity for making a statement with stripes! The cuff or the flounce sleeve, the placket itself or even a bit of colour (stripe) blocking on the main pattern pieces! Drapey goodness If you want to play with a fabric that has more drape – rayon challis, polyester, tencel… Feast your eyes on the dreamy lighweight inspiration below! Lovely layers I’m a summer girl through and through but the one bonus of the approaching Autumn is layers!! A Morningside shirt or dress would make the perfect layering piece. Pants please The women of Tokyo completely embrace layering pants under dresses and I love that it makes these pieces even more versatile wardrobe additions! Crisp white This classic works all year around – whether it is winter white or summer white! So now you have a ton of ideas for how to use this pattern! I already have three different versions in my sewing queue! Let me know in the comments below if you’re going to make these up and what your plans are! Remember, you can pick up the pattern here so you’re ready to join in the sew along! (Use the code at the top for 25% off) I cant wait to sew with you!!
Trendschnitt Skirt Jupe No9 – English Translation Pattern Instructions
Additional Supplies: Invisible zipper, Interfacing 1. Select your size from the size chart and trace your pattern pieces in your selected size. Transfer all the markings and add in the seam allowances as follows: 2cm unless otherwise noted Waistband 1cm at top and bottom and 2cm on the sides/back Hem and slit 5cm To create hanger loops, cut a strip of lining fabric in line with the grain around 50cm in length and 4cm in width. 2. Fold up the marked seam allowances on your traced pattern pieces and connect the lines. Connect the lines on the right side of the skirt piece with a horizontal line, this will result in a spike. Lay your fabric out flat and cut out 1 each the pocket pieces and front skirt piece. 3. Cut out the remaining pattern pieces. To cut the waistband accurately, you can cut a larger piece of fabric, attach the pattern piece with adhesive and then cut it to size. Be sure to mark the dart and where the lines intersect with a pin. Snip the end of the darts and mark the point with a tailors tack. (See how towards the end of this post) 4. Interface the pocket opening, zipper opening as well as the top and zipper opening edges of the waist band pieces. Mark the oblique folds on the front skirt piece. The easiest way to do this is by marking the end point and using a copy wheel and tracing paper to mark them out. 5. Align the center back and stitch until the zipper opening. Leave 20cm unstitched for the zipper opening. Overlock the raw edges. Press the seam open. Pin and stitch the darts, knotting the threads at the end. Press the darts towards center back. If preferred, you can stitch them down on the angle. 6. Right sides together, align the edge of the smaller pocket bag on the pocket opening of the front skirt piece. Stitch at the 1cm seam allowance. Press the seam open and then flip the pocket piece so wrong sides are together and press. 7. Top stitch the seam you have just pressed. Align the larger pocket bag piece and mark a line where the pocket opening lies. 8. Pin the pocket bag in place and stitch around the curved hem at the 1cm seam allowance. Reinforce this seam by sewing over the stitch line again. Overlock the seam allowances together. 9. Use a ruler and chalk to transfer the oblique fold markings to the right side of the front skirt piece if you haven’t already. They should be parallel with the sloping pocket opening. The marks should align with those you made on the wrong side. 10. Using the markings as a guide, fold and pin from the left towards the right (as you look at the pattern piece). Pin so that you can sew the pleats on the wrong side. 11. On the wrong side, sew close to the edge from the end point towards the waist, making sure to stay stitch and fix the start of each line of stitches. Press the folds. Fix both the folds and pocket bag in place along the waist line and side seam at 5mm seam allowance. 12. Align the waist band pieces with the front and back skirt pieces (be cartful to ensure there are no puckers as you sew). Attach with a 1cm seam allowance. Press the seams towards the waistband. Fold and press the middle back pieces away from each other at 1.5cm. 13. Open the invisible zipper, place the first side right sides together, directly inline with the inside edge of your overlocked edge. Pin in place up to 2cm below the top of the waistband zipper opening. 14. Use a zipper foot, spreading the zipper teeth flat and stitch as close as you can to the zipper teeth. 15. Close the zipper, place a cross-pin on the zipper tape at the seam intersection point and the waistband seam. Open the zipper again and align the pins with the intersection point and waistband seam on the side it will be attached to. Pin in place. 16. Stitch the second side in place up to 2cm below the zipper opening. 17. Press the zip in place. Check the inside of the zip is sitting nicely. 18. Trim the 2cm seam allowance of the inner waistband outside edge for both the inner back waistband pieces. (I actually leave this until step 20 and trim the excess once it is attached). 19. (Right sides together, align the inner waistband with the zipper seam allowance). Sew the inner waistband at 0.7cm to the zipper fastener seam allowance and press. 20. Fold the center back so that the zipper teeth are sandwiched by the two waistband pieces. Since you trimmed the seam allowance earlier this should line up exactly. 21. Stitch the waistband in place at 1cm seam allowance. Snip the curve of the seam allowance to allow for movement (be careful not to go through the stitches). Repeat this step to attach the inner waistband to the front skirt waistband. 22. Press the seams open (using a tailor’s ham or clapper will make this easier) then press to the side. 23. Overlock and press the 5cm hem of the front and back skirt pieces. 24. Fold the point on the hem into a mitered corner (also known as ‘tablecloth’ or ‘letter corner’ in German!). Mark the connection point with pins on each side of the hem (do not pin together). 25. Carefully unfold the corners so the pins don’t fall out. 26. Turn the corners to the back so that the right side of the fabric is on the inside. Align the two pins back on top of each other. The remaining edges do not have to match. If you like, mark the line from the pressed seam allowance to the pins. 27. Stitch along this line to make the mitered corner. Do not cut the seam allowance in case you want
Trendschnitt Skirt and Cami Giveaway
This is me so excited to show off these new makes. My hubby is taking some snaps as I keep an eye on our two boys getting ever closer to that looong flight of wooden stairs.. But that’s not what I’m here to talk about. The pattern (Psst you have a chance to win one of each theses patterns at the end of the post!) The patterns for this cami and skirt are designed by Susanne of Trendschnitt. Her designs are edgy and eye catching. She loves playing with stripes and silhouette. So I contacted Susanne and then proceeded to make a long list of patterns I lusted after. When I eventually narrowed it down she sent me these two. It’s the details that elevate these patterns to the next level. They are beautifully constructed – the kind of patterns that make you want to slow down and enjoy the process. This approach is not great for an 11th hour make for an event the next day but it is great if you want something extra special to pop in your wardrobe. The completed garments have an air of effortlessness that only comes from quality design. Before making these garments the only German words I knew were danke, Lederhosen and gusundheit… now I know oberweite (bust), nahtverdeckten reissverschluss (invisible zip), tischtuchecke (mitered corner or tablecloth corner in German)! But the great news is that I have done all the work for you! You can find an English translation of the instructions for the Jupe skirt No9 here and the top with spaghetti straps no34 here. The details! I love that I can wear the cami and skirt together for a faux dress look or I can wear them separately for completely different looks too! The skirt has this fabulous asymetric hem and angular pleats that perfectly align with the line of the pocket. These angular lines are also picked up in the front and back v-necks of the cami. (Looking at the pic below I might need to grade up at the bust for my next cami). The cami also features side slits and cool triangular side panel. But my favourite feature? It’s the top stitching for sure! It’s not perfect but it was still so satisfying to sew! I’m going to go nuts with the next cami I make and choose a bright contrasting thread. The Fabric I used the Tanpopo print, an original handprinted fabric by the independent Japanese design house, Nocogou. Nocogou is made up of the husband and wife team, Katsuyuki and Megu. They soak up the slow life in the countryside of Aichi Prefecture, Japan with their two cats, Chachamaru and Ohagi! Nocogou fabric designs are inspired by Megu and Katsuyuki’s day to day life. Every piece of their fabric is handprinted with love, using a mould made for each individual colour in the print – resulting in a beautiful gentle texture and a unique piece every single time. Megu and Katsuyuki describe the Tanpopo design as “Dandelions bathed in sunshine. Yellow flowers spread all over.” The fabric itself is a lightweight broadcloth, 100% cotton and is perfect garment sewing. I have a great range of Nocogou fabrics in store, for you to peruse! And there’s a giveaway! If you want to sew up this cami and skirt you can pop over to the Trendschnitt site to purchase them (don’t forget to check out my English translations linked above). You also have just 12 hours left to enter the giveaway I’m currently running on my Instagram page. You could win a paper pattern of the Jupe skirt No9 and a PDF pattern of the No34 Top with Spaghetti Straps! To enter, simply: 1. Follow me @indybindyfabrics 2. Follow the @trendschnitt 3. Tag a sewing friend in the comments on my announcement post on Instagram And you’re in with a chance! If you want more entires… The more friends you tag (in separate comments), the more entries you get! For THREE ADDITIONAL entries, sign up to my mailing list below where you’ll also get 10% off your first purchase, a regular dose of sewing tips & tutorials, and access to members only offers! Leave this field empty if you’re human: The GIVEAWAY ends Monday 4th November, 10pm Tokyo time. The winner will be chosen randomly and announced within 48 hours! GOOD LUCK!!
Fibre Mood Jasmin Pants
I LOVE Spring/Summer sewing. Floaty dresses, flirtatious skirts and ten different versions of the Ogden cami! But as it gets colder my wardrobe goes from fun to functional very fast. For most of Winter you can find me in a uniform of jeans, boots, a sweater and coat. This year, I’m determined to break free! So I’m embarking on sewing pants that can replace my jeans and some coats as well! And these pants? Well, I can imagine living in these babies! Move over jeans – here come my paperbag pants! A pair of paperbag pants have been rattling around in my head for the longest time. I toyed with the idea of hacking a pattern I already owned but then I was presented with the opportunity to make the FibreMood Jasmin pants and they fit the bill perfectly! I am ALL about the high waist. It’s comfortable, waist-defining and chic all at once. What’s not to love?! I definitely tested the Jasmin’s out – I rode to the local oval with my two little boys. It has this great wall for photos but the trade off was an hour of soccer on the field afterwards (yes, I brought a change of shoes!). I wondered if paperbag pants, as cool as they are, would be one of those makes that only goes with a couple things in my wardrobe because of it’s unique silhouette.. but I was way off the mark. They go with SO much, a cami and blazer, bodysuit, tucked in blouse or even a cropped sweater. I feel I could wear these for the office, weekend shenanigans and for date night too! I’ve been splitting my time between family, work and sewing non-stop since our move back to Australia in mid January. I have loved being able to delve into my sewing practice but I’ve not made a lot of time to sit and write about it. But that’s about to change – so if you haven’t subscribed yet, make sure you sign up for my newsletter to be first to hear the inside story of all my makes, new releases to the shop (lots coming soon!!) and any of the fun tutorials or sew alongs coming this year. I would love to slash the Jasmin pattern at mid thigh and make another pair as shorts. They’d dress up any basic tank in an instant. BUT seeing as it’s only getting colder from now on in Australia, I may make a longer version in a lovely heavier fabric first!